Call Us: +604-399 9907
Email Us: salesbw@fonkok.com.my

24, Lorong Talang 9, Taman Mas, 13600 Prai, Penang.
Call Us: +604-399 9907
Email Us: salesbw@fonkok.com.my
24, Lorong Talang 9, Taman Mas, 13600 Prai, Penang.

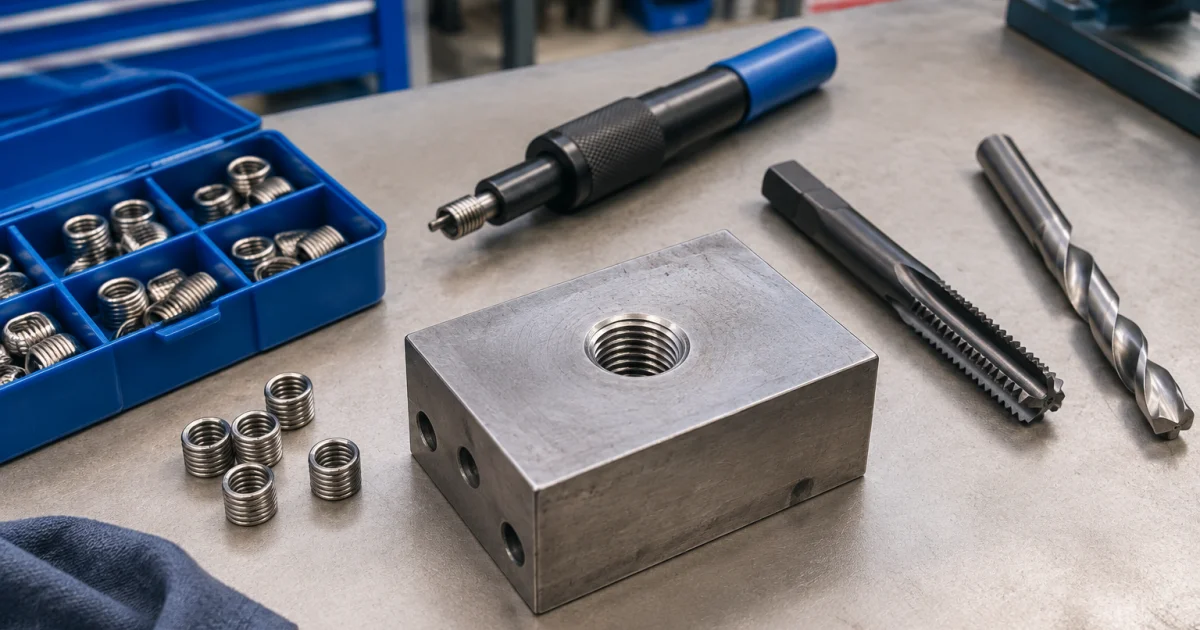
Stripped threads are common in maintenance and fabrication work. Over-torque, cross-threading, repeated disassembly, or soft base metals (especially aluminium) can leave a fastener that won’t hold torque or pulls out under load. A wire thread insert repair restores the original bolt size and creates a durable internal thread—often more wear-resistant than the parent material—without replacing the component.
This tutorial covers practical selection and installation of Recoil wire thread inserts in a Malaysian workshop. You’ll learn how to confirm the original thread, choose insert type and length, drill and STI-tap correctly, install and manage the tang (when used), and verify the repair before returning the assembly to service. If you’re sourcing locally, it also helps you specify the right kit and tooling for Recoil Fasteners Malaysia applications.
Confirm the fastener specification and the condition of the parent material before drilling. Many “failed threads” are actually the wrong bolt pitch or damaged bolt threads.
Good insert candidates: aluminium housings, castings, brackets, engine components, jigs/fixtures, and machinery parts where the original bolt size must be retained and the joint may be serviced repeatedly.
Pause and reassess: safety-critical lifting points or structural joints where surrounding metal is compromised, or holes too close to an edge for the larger tapped diameter.
Selection comes down to thread spec, insert type (free-running vs locking), and length (1D, 1.5D, 2D, etc.). Matching these prevents bottoming in blind holes, protruding coils, or unintended changes to tightening torque.
Related product pages for matching insert style: free-running inserts and locking inserts.
Measure usable depth (especially for blind holes) and choose a length that fits without coils protruding above the surface and without bottoming out.
| Decision point | What to check | Recommended choice | Common mistake to avoid |
|---|---|---|---|
| Insert type | Vibration and need for prevailing torque | Free-running for most repairs; locking for vibration-critical joints | Using locking inserts without accounting for higher assembly torque |
| Insert length | Usable depth and target engagement | 1.5D when depth allows; shorter for tight blind holes | Too long in a blind hole (bottoms out and deforms) |
| Hole type | Through vs blind; tang clearance/retrieval | Plan tang removal and bottom clearance before choosing length | Breaking tang with no safe way to remove it |
| Material | Aluminium vs steel/stainless behavior | Use sharp tools and suitable cutting fluid | Dry tapping (especially stainless) leading to galling/poor threads |
Most insert failures come from misalignment, wrong tap type, or chips left behind. Set up the correct system before starting:
For compatible taps, mandrels, tang breakers, and spares, see wire thread insert accessories and tooling.
Checkpoint: hole is round, clean, and centered. A wandered hole can misalign the bolt and overload the joint.
Checkpoint: threads look consistent and clean. Rough cutting or torn material can lead to loose inserts.
Checkpoint: the insert sits evenly. Uneven seating often points to angled tapping or contamination.
Checkpoint: confirm tang removal when required; loose tangs can obstruct passages or interfere with moving parts.
Tighten gradually and watch for smooth torque rise. Sudden “give” may indicate cracking, insufficient surrounding material, or a repair that isn’t holding. For critical joints, follow your internal engineering procedure for verification and inspection.
Look for cracks radiating from the hole, especially in castings or thin sections; an insert can’t compensate for broken surrounding material.
Reliable stripped-thread repair comes from a controlled sequence: confirm the original thread, choose the right insert type and length, drill to the specified size, STI tap straight with lubrication, install to correct depth, manage the tang safely, and verify with a hand-fit and face check before reassembly. Standardising these steps reduces rework and makes insert repairs predictable in day-to-day maintenance.
A standard tap cuts the final thread size for a bolt or screw. An STI (Screw Thread Insert) tap cuts a larger, special thread profile designed to accept the wire insert. If you use a normal tap, the insert won’t fit correctly, may jam, or may install but fail under load.
Free-running inserts are the general-purpose option for most stripped thread repairs. Locking inserts add prevailing torque to resist vibration loosening, but they increase assembly torque and can affect torque-to-tension control. Use locking inserts when vibration is a known issue and your assembly method accounts for it.
Measure usable thread depth and ensure the insert will not bottom out. As a practical choice, 1.5D is often a good general length if depth allows. For blind holes, leave clearance under the insert for the tang (if present) and for chip space during tapping, then verify the bolt can reach full engagement smoothly.
Not always. Many wire inserts use a tang for installation, and it’s commonly removed after installation—especially in through-holes or where the tang could interfere. In some blind-hole situations, tang removal may be risky if you cannot retrieve it. Plan tang management before installation to avoid leaving debris in sensitive areas.
Back-out usually indicates poor hole preparation: chips or oil left in the tapped hole, incorrect drill/tap selection, angled tapping, or an insert that isn’t seated below the surface. Re-check that you used the correct drill size and STI tap, clean thoroughly, and reinstall to the proper depth. If the insert is damaged, replace it.
Fon Kok Fastener Sdn Bhd supports maintenance teams and machine builders with a one-stop range of wire thread inserts, insert accessories, and tooling. If you tell us your thread size/pitch, base material, and whether the hole is through or blind, our team can help you match the correct insert type, length, drill size, STI tap, and installation tools for a clean, repeatable repair.


